The Sims 3: Create CAS presets easily
This is a guide explaining how to generate presets in-game and how to make them permanent.
It's a very easy tutorial that can be followed by beginners to modding.
Click the images in the tutorial to expand them, and the list below to go to the various sections.
Table of contents (click!)
1. What you'll need
If your item isn't in .package format, you will need to convert it using the Multi-Extracter.
If your item is from the Sims 3 Store, run the .sims3pack through S3RC (drag-and-drop; NOT through decrapify.exe) before running it through the Multi-Extracter.
2. Preparing the file and creating the presets
To clone items, use S3OC. You will need to do this for EA items that come through installed packs.
If you don't want them to be default replacements, tick the "Renumber/rename internally" option.
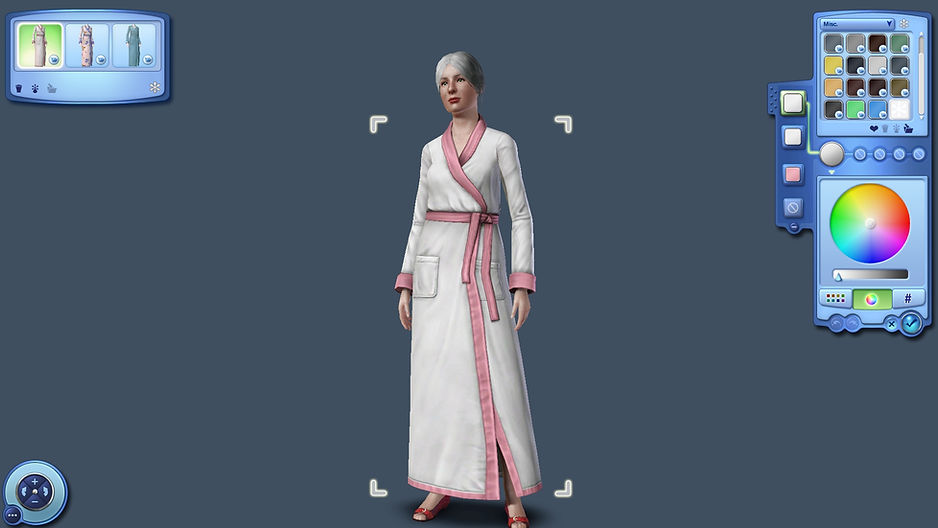
I will be using a non-default replacement clone of the basegame elder female bathrobe as an example.
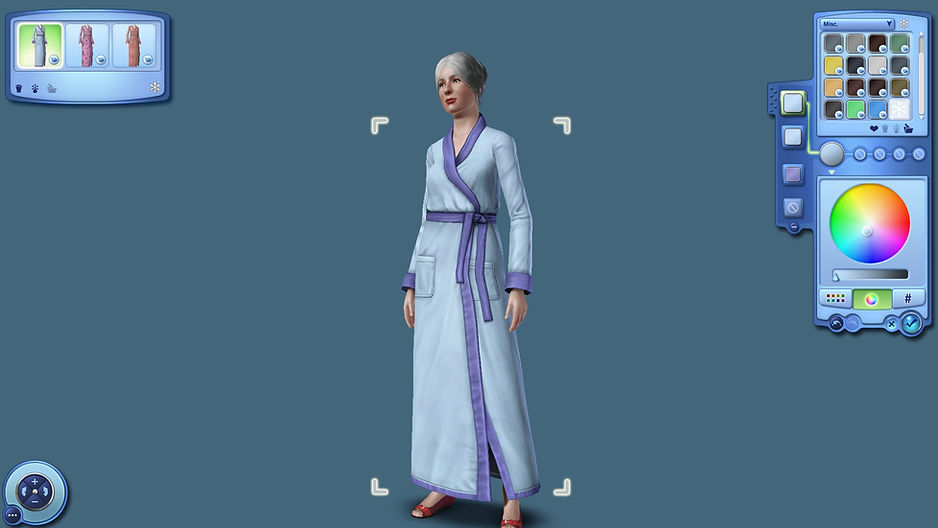
To create the presets, open your game, enter CAS with your sim, and add the item to their outfit. Recolor it however you want, then click the "Save" icon in the Presets panel on the top left in order to save the preset. I recommend using basegame and EP patterns (basically, no custom content ones) to prevent issues. Do this for however many presets you want to make.

When you're done, you can exit the game. You don't have to save the game, just make sure it doesn't crash, otherwise your newly created presets will be lost.
3. Finding and exporting the new presets
Any presets you create are saved in the userPresets.package file under My Documents. For me, this file is located under D:\ Documents \ Electronic Arts \ The Sims 3. This file can be deleted and will be recreated by the game, but you will lose any custom presets you made and will have to redo them.
First, open the .package file of the item you want to edit the presets of, and copy the resource ID of its CASP resource (select the CASP resource, hit Enter).

Next, go to your My Documents install folder for The Sims 3 and locate the userPresets.package file, then open it in S3PE.
Filter the resources by the instance/resource ID you just copied, as seen below (click to enlarge):

At this point you can see not only the resource we're looking for, but our three newly-created presets! These are very easy to extract: click on the UPST resource, then on the Grid button at the bottom of the program window and click the arrows to expand each preset section:

Export each of the presets in turn, naming them something easy like "xml-01", "xml-02", "xml-03". You can exit the userPresets file.
4. Importing the new presets
Now it's time to import the generated presets over the existing ones. Open the item in S3PE and click on the CASP resource, then the Grid button. What we're going to do is similar to the above, except instead of exporting the XML files, we're going to import the ones we generated earlier. Expand each preset category and import your new presets in them.
You don't have to import the XMLs in the same order you extracted them in (you can have xml-03 in the 1st preset for example), just make sure you can keep track of them when creating your thumbnails.
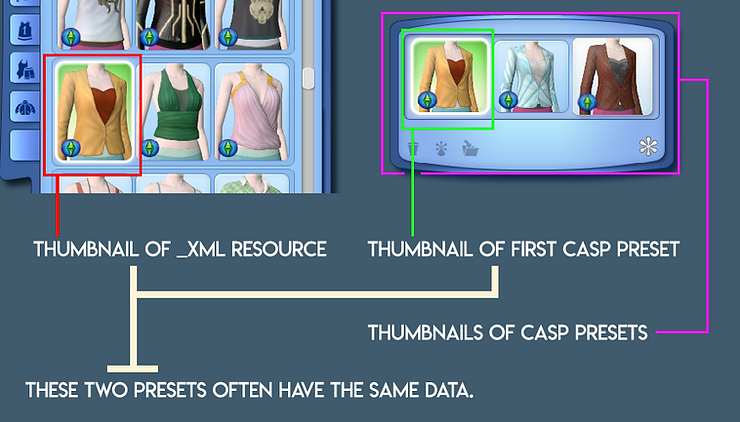
In addition to this, locate the _XML resource in the main program window and replace it with your "xml-01" preset (or the preset you imported in the first slot). This is the preset the game uses when you click on an item in CAS, and it's independent of the presets in the Preset panel; it also uses thumbnails with the 0x00000000 group ID, while you may notice that presets in the Preset panel have thumbnails numbered as 0x00000001, 0x00000002, 0x00000003 etc. (the Unknown1 field).
Save your .package, exit S3PE, and let's take a look at our item in-game!

The good part is that our presets work! The bad part is that not only do our presets not have the correct thumbnails, but the ones we generated are still in the Presets tab! Since the latter have the correct thumbnails, we're going to export them and make our item's presets point to the new (correct) thumbnails instead, and delete the extras.
5. Changing thumbnails and deleting extras
Navigate to the Thumbnails folder within your My Documents install (for me: D:\ Documents \ Electronic Arts \ The Sims 3 \ Thumbnails).
What we are interested in is the file named CASThumbnails.package; this one is a cache of all the thumbnails for CAS items that you've added as custom content (the basegame, EPs and SPs have separate thumbnail caches in their respective installation folders).
Open CASThumbnails in S3PE, and once again filter by your item's CASP resource ID. Since the bathrobe is a cloned item, the game generated new thumbnails for the existing presets. Export the new ones but don't rename them this time! Then close S3PE.
Once again, open your item in S3PE and look for the THUM resources. Normally, the game will generate 3 sizes of thumbnails: 32x32 px (THUM 0x626F60CC), 128x128 px (THUM 0x626F60CD) and 256x256 px (THUM 0x626F60CE) — we are only interested in the third type.
You have multiple ways of adding thumbnails:
-
if the item has 3 thumbnails of varying types, you can hit Enter on each of the resources and change their type to THUM 0x626F60CE, then import your new thumbnails over them;
-
if the item has 3 thumbnails of varying types, you can delete the smaller ones and duplicate the THUM 0x626F60CE one however many times you need, then import your new thumbnails over them;
-
if the item doesn't have thumbnails at all, you can go to Resource \ Add and enter information as seen in the screenshot below (Instance ID must match the ID of the CASP resource!), then hit OK. Afterwards, right-click on the new resource and Replace it with the appropriate thumbnail.

For the game to correctly display the thumbnails in the Presets panel, the THUM resources' group IDs must match the Unknown1 fields of the presets (which you can find in the CASP resource).

To dispose of the extra presets, whose data is stored in the userPresets file, you can either:
-
delete them in-game through CAS;
-
delete the UPST resource in the userPresets file with the ID matching your item's CASP ID.
And now we're all good! 👍
Creating thumbnail replacements for expansion/stuff pack items (if replacing EA presets)
The procedure is slightly different for these, since even though the CASP thumbnails have the Unknown1 fields' contents as 0x00000001, 0x00000002, 0x00000003 etc., you will find that using the same naming scheme on your new thumbnails won't actually replace the old ones.
Fortunately, this is quite easy to fix and only requires knowing the IDs that EA used for the thumbnails.
Once you have your new thumbnails generated and imported into your final package, navigate to the install folder of the EP/SP the item is from. For this example, I'll be using an adult female blazer from Showtime (afTopEP6SuitExec).
My install folder for Showtime is located at: D:\Electronic Arts\The Sims 3 Showtime
Within this folder, you will find another folder called "Thumbnails", and in it a .package file called CasThumbnails.package. Open this while, as always, keeping in mind not to make any direct modifications to game files (like overwriting or editing game resources in these files).
Once again, use S3PE to filter the resources by the CASP ID of your item (in this case, 0x30534D91F14CC354). To save yourself time, you can also enable the ResourceType field and search by 0x626F60CE. Here are my results:

These thumbnails represent, as follows:
-
0x58000000 represents the preset of the _XML resource;
-
0x58000001, 0x58000002, 0x58000003 represent the thumbnails of the CASP presets. Once again, the _XML preset is independent of the first CASP preset.
And your thumbnail groups need to match these, for the replacements to work. You can either export these thumbnails from CasThumbnails.package, import them in your package and replace them with the new thumbnails, or just give your new thumbnails the same group IDs as the game's thumbnails.
I have found that, in this case, changing the Unknown1 fields to match doesn't matter, so you can leave those alone.
Something I've observed from different CAS items is that thumbnails don't follow the same naming scheme in their groups.
While the group ID of the _XML preset's thumbnail will always end in 00, those of the presets won't necessarily end in 01, 02, 03 etc. This is why it's important to look up these IDs if you find that your new thumbnails aren't showing up — even if the Unknown1 fields and the group IDs match.
If you choose to make your _XML preset and first CASP preset the same (which is the case for most items and, IMO, the reasonable way), then you should have the same image for your 00 thumbnail and the thumbnail of your first CASP preset.
6. Adding presets to EA items without replacing old ones
You might wonder what the point is in adding presets like this, when the userPresets file is right there. Well, the advantage of using this method is that should your game experience issues, these files are less likely to become corrupted than regular cache files. Luckily, adding new presets is very easy!
For this, you need to create your presets and export the XMLs for them (basically Steps 1 and 2).
Once you have them, open the CASP resource of your item and click on the right of the Presets field. You'll notice a square button with three dots pop up — click it. It will open a panel with a list of your presets.
Click on the last preset and then on the Copy button below; I've found that clicking Add results in an error, but this doesn't.
Give a new number to your Unknown1 field, that isn't in use by another preset, and import your first XML.
Do this for the remaining presets, then click Commit.
Then, of course, adjust your thumbnails according to Step 5.

7. Notes and observations
Doing default replacements
If you're doing default replacements, the procedure is the same except that when you clone the item using S3OC, you untick the "Renumber/rename internally" option.
What to keep and what to delete
If you're doing default replacements, you don't have to keep all the resources in the .package file — only the edited ones. So you don't need anything except the CASP and the new THUM resources if you're adding presets, and the _XML, CASP and old THUM resources if you're replacing EA-made presets.
Deleting added presets
For added presets, you'll notice in the screenshot above that the trash bin icon is enabled, meaning the game is telling you you can delete the preset. Even though you get this option and the confirmation dialog, it won't actually delete the preset. If you wish to remove it, you must delete it from the CASP resource, using S3PE.
If it's a file with replaced presets, simply delete the .package from your game. This is why you don't work directly on game files unless you're very aware of the consequences and know what you're doing 😊